Production Clocks
Getting Started
Two production clocks are available which can enabled by ticking the Production Clocks checkbox in Settings -> Options
A 1920x1080 display or higher is recommended, as the Production Clocks will be hidden if there is no space available below the T-Bar.
Other elements above the Production Clocks can be disabled from Settings -> Options as well in order to free up space.
Overview
Two production clocks can be configured to independently display two of the following options:
Clock: The current time with an optional hour offset to show a different time zone.
Event: The remaining time before, during and after predetermined event times.
Recording: The total duration so far of any active recording.
Streaming: The total duration so far of any active streams.
Settings
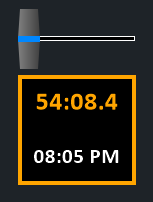
Double click the Production Clocks display below the T-Bar to open the Settings window.
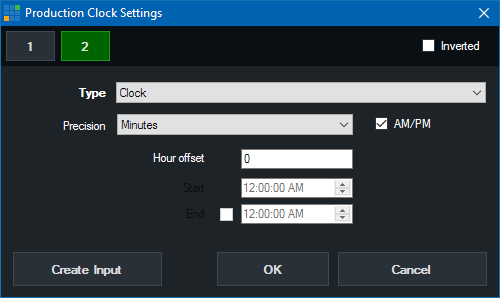
The two clocks available can be configured from the 1 and 2 buttons which represent the Top and Bottom clocks on the display respectively.
Inverted: By default the display will have a black background. Click the Inverted button to switch this to white.
Type: Select the type of time to display out of Clock, Event, Recording and Streaming.
Precision: Determine how accurate the time is that is displayed out of Minutes, Seconds and Fractions.
The font size will automatically decrease at higher accuracies so the entire time will still be displayed, so if a bigger font
is desirable select Minutes here.
Clock Settings
Hour offset: Select an offset, positive or negative in hours, to add to the current system time before display.
AM/PM: Tick to show the time in 12 hour format with AM or PM next to the time on the display, otherwise display in 24 hour format.
Event Settings
Start/End: Select a start time and optionally an end time for the event.
Before the Start time, the clock will show a countdown in amber.
With End Time
During the event, the clock will show a green countdown.
After the End Time, the clock will show a red of the duration since the event ended.
Without End Time
After the Start time, the clock will show a green duration.
Create Input
Create Input will create a high resolution version of the clocks as a standard vMix input, allowing it to be displayed
on the MultiView Output or on outputs such as Fullscreen.
If the "Cameras / Calls / Audio Inputs" tickbox is enabled in Settings -> Outputs / NDI this input will also be available
via NDI for display anywhere on the local network.
Note: Only one Production Clocks input can be created at a time.