« Back to Knowledge Base
Creating a new YouTube Live Stream using the new YouTube Studio interface
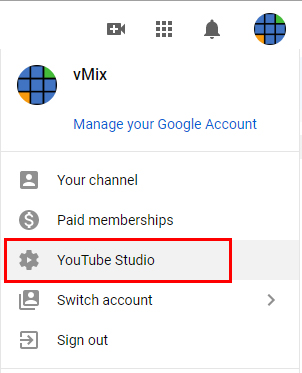
1. Log into your YouTube account. Go to the top right, click on your icon and then click YouTube Studio.
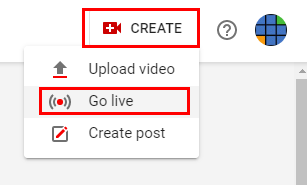
2. Up to the very top right of your screen, select the Create button and choose the Go live option. If this is your first time, you may need to wait 24 hours for YouTube to activate your account for live streaming.
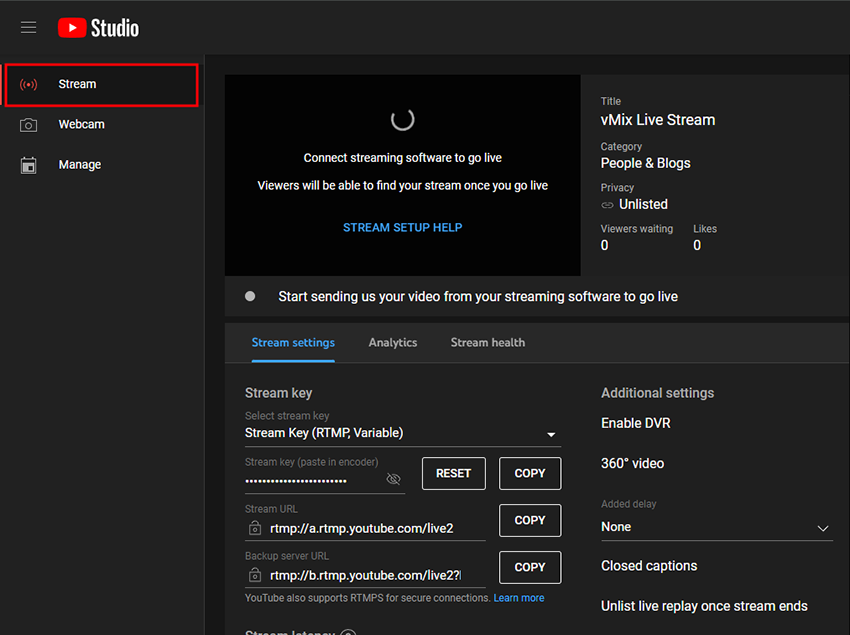
3. You will be taken to the YouTube Studio interface. There are two options for streaming:
Option 1 - Stream instantly
Select the Stream option from the left sidebar to setup a stream that will stream instantly. This means as soon as you start the live stream in vMix, YouTube will automatically go live as well.
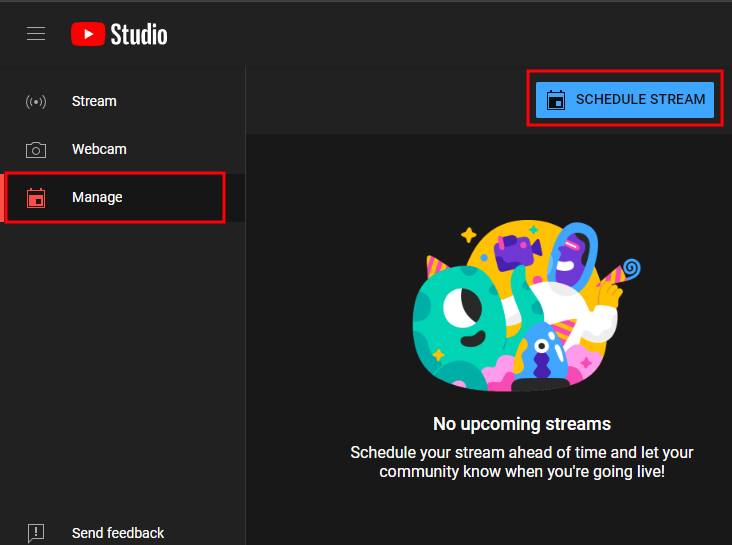
Option 2 - Choose when to stream / Schedule a stream
Select the Manage option from the left sidebar, then the Schedule Stream button. This will ask you to schedule a stream at a particular time. When you start the stream in vMix, you will also need to start the stream from the YouTube interface when ready. You can start it before the scheduled time if preferred.
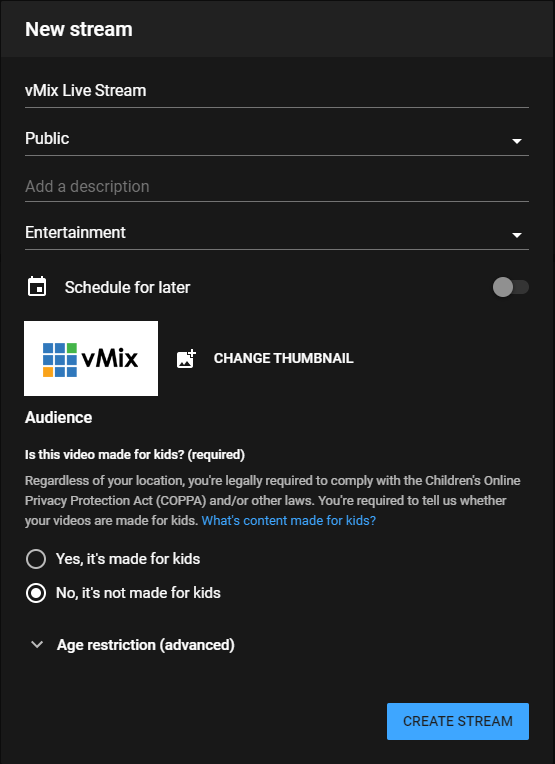
4. Enter in your live stream details including Title, Description and other settings. Then press Create Stream once done.
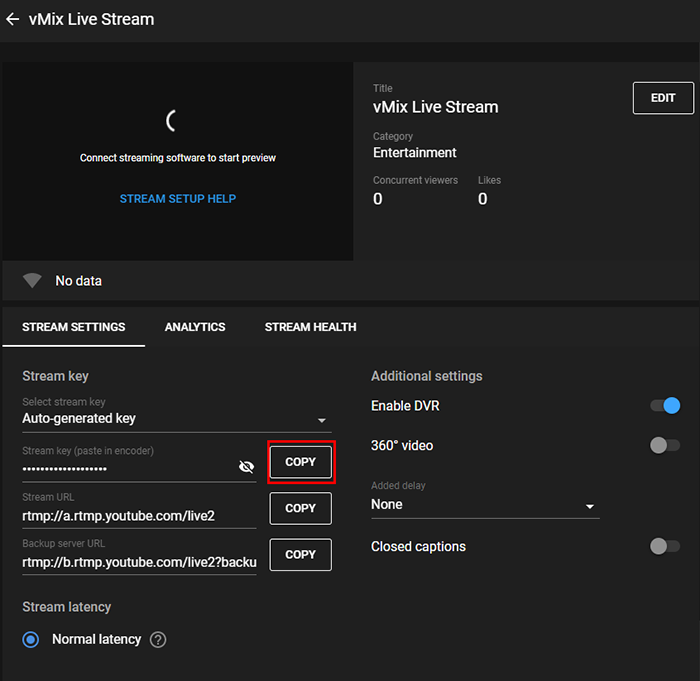
5. Next you will see some Stream Settings including a Stream Key. Click the Copy button to copy the Stream Key.
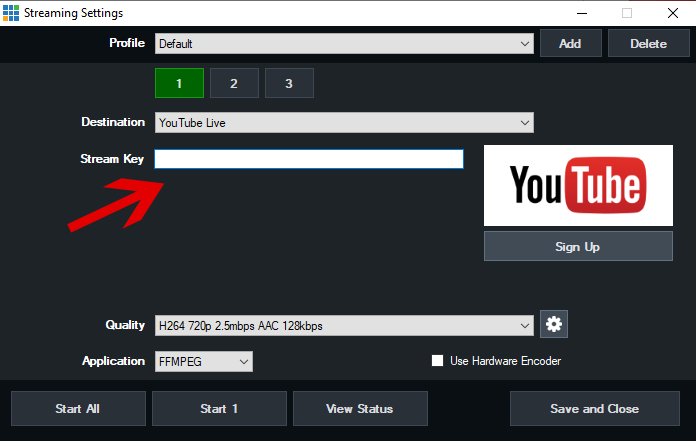
6. Open up the stream settings window in vMix. From the Destination dropdown menu, select the YouTube Live option. Underneath that will be a Stream Key field. Paste the Stream Key you have copied from Step 5 into this field.
7. Click Save and Close to save your YouTube Stream settings
8. To begin the stream click the Stream button in your vMix window or open the Stream window and click Start to begin sending the stream to YouTube Live.
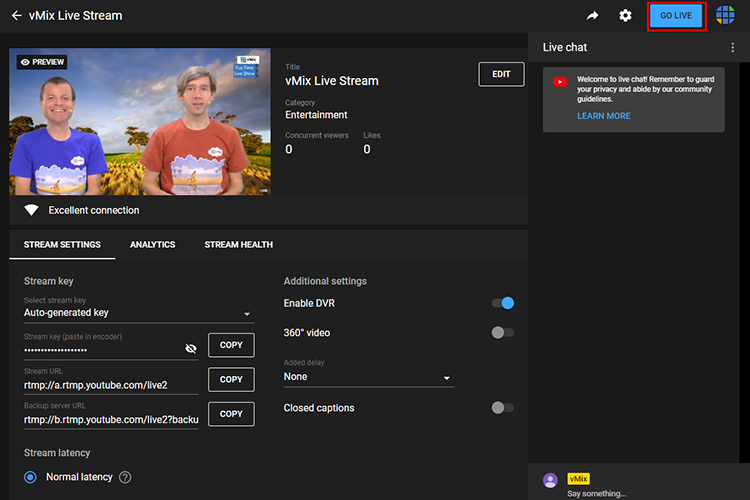
9. If you have scheduled the stream - go back to your web browser where you should now see the live stream preview showing. Click the Go Live button to go live.
Alternatively, if you have not scheduled the stream it will go live instantly on your Youtube Channel.
Last Updated: Monday, April 29, 2024 4:21:30 PM